Stages of Language Development:
Step 1: Spoken Language: create an internal dictionary and practice using the words in it
Step 2: Phonemic Awareness: learn the sounds within words and the sounds/symbols of our alphabet
Step 3: Creating Words (Writing): learn to put those sounds/symbols together to make words
Step 4: Reading: Learn to decode those sounds/symbols to decipher words
Questions and Answers
Why do you teach letter sounds rather than letter names?
What does a child need to learn to be able to write or read? That the letter “a” has a name, pronounced “aye,” or that it makes a sound, “æ” in the international phonetic alphabet, like in “apple” or “cat”? From a literacy perspective, the answer is clear: to write and read, children need to learn the sounds letters make, not their names. “Cee-aye-tee”, no matter how fast you say it, never blends together to make the sound “cat.” Yet most commercial products and educational television programs focus on teaching letter names. At best, they introduce sounds and names simultaneously, with emphasis on the name of the letters. In Montessori, in contrast, we start literacy by teaching sounds exclusively. (Download a list of Phonetic Letter Sounds here.) Because we don’t focus on letter names, the process is much less confusing for children, and it enables them to more quickly begin to write and read.
Why do you present only lowercase letters at first?
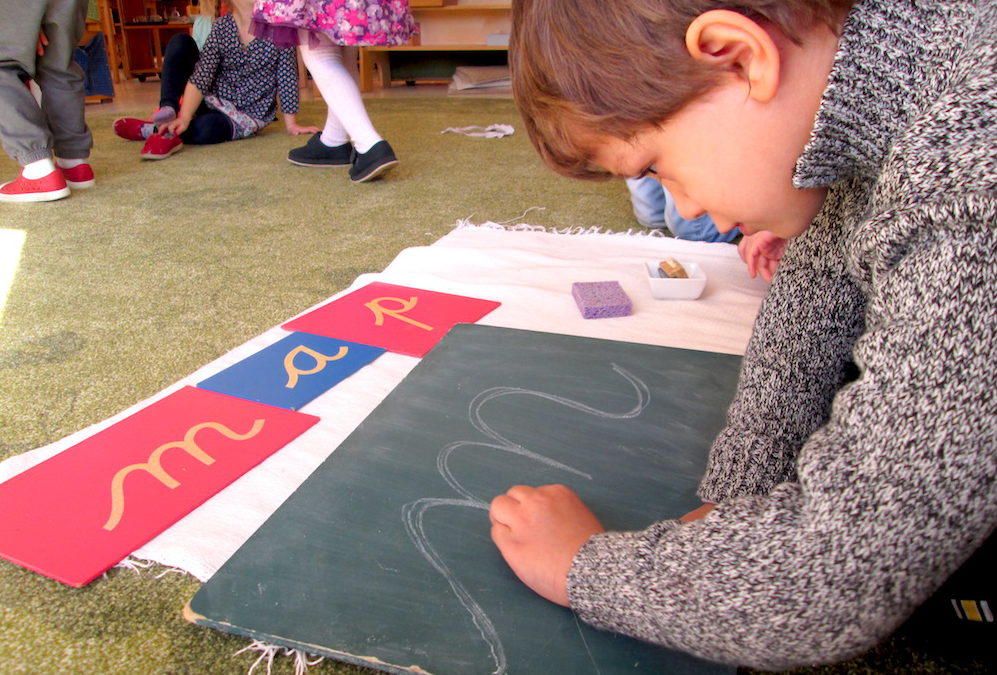
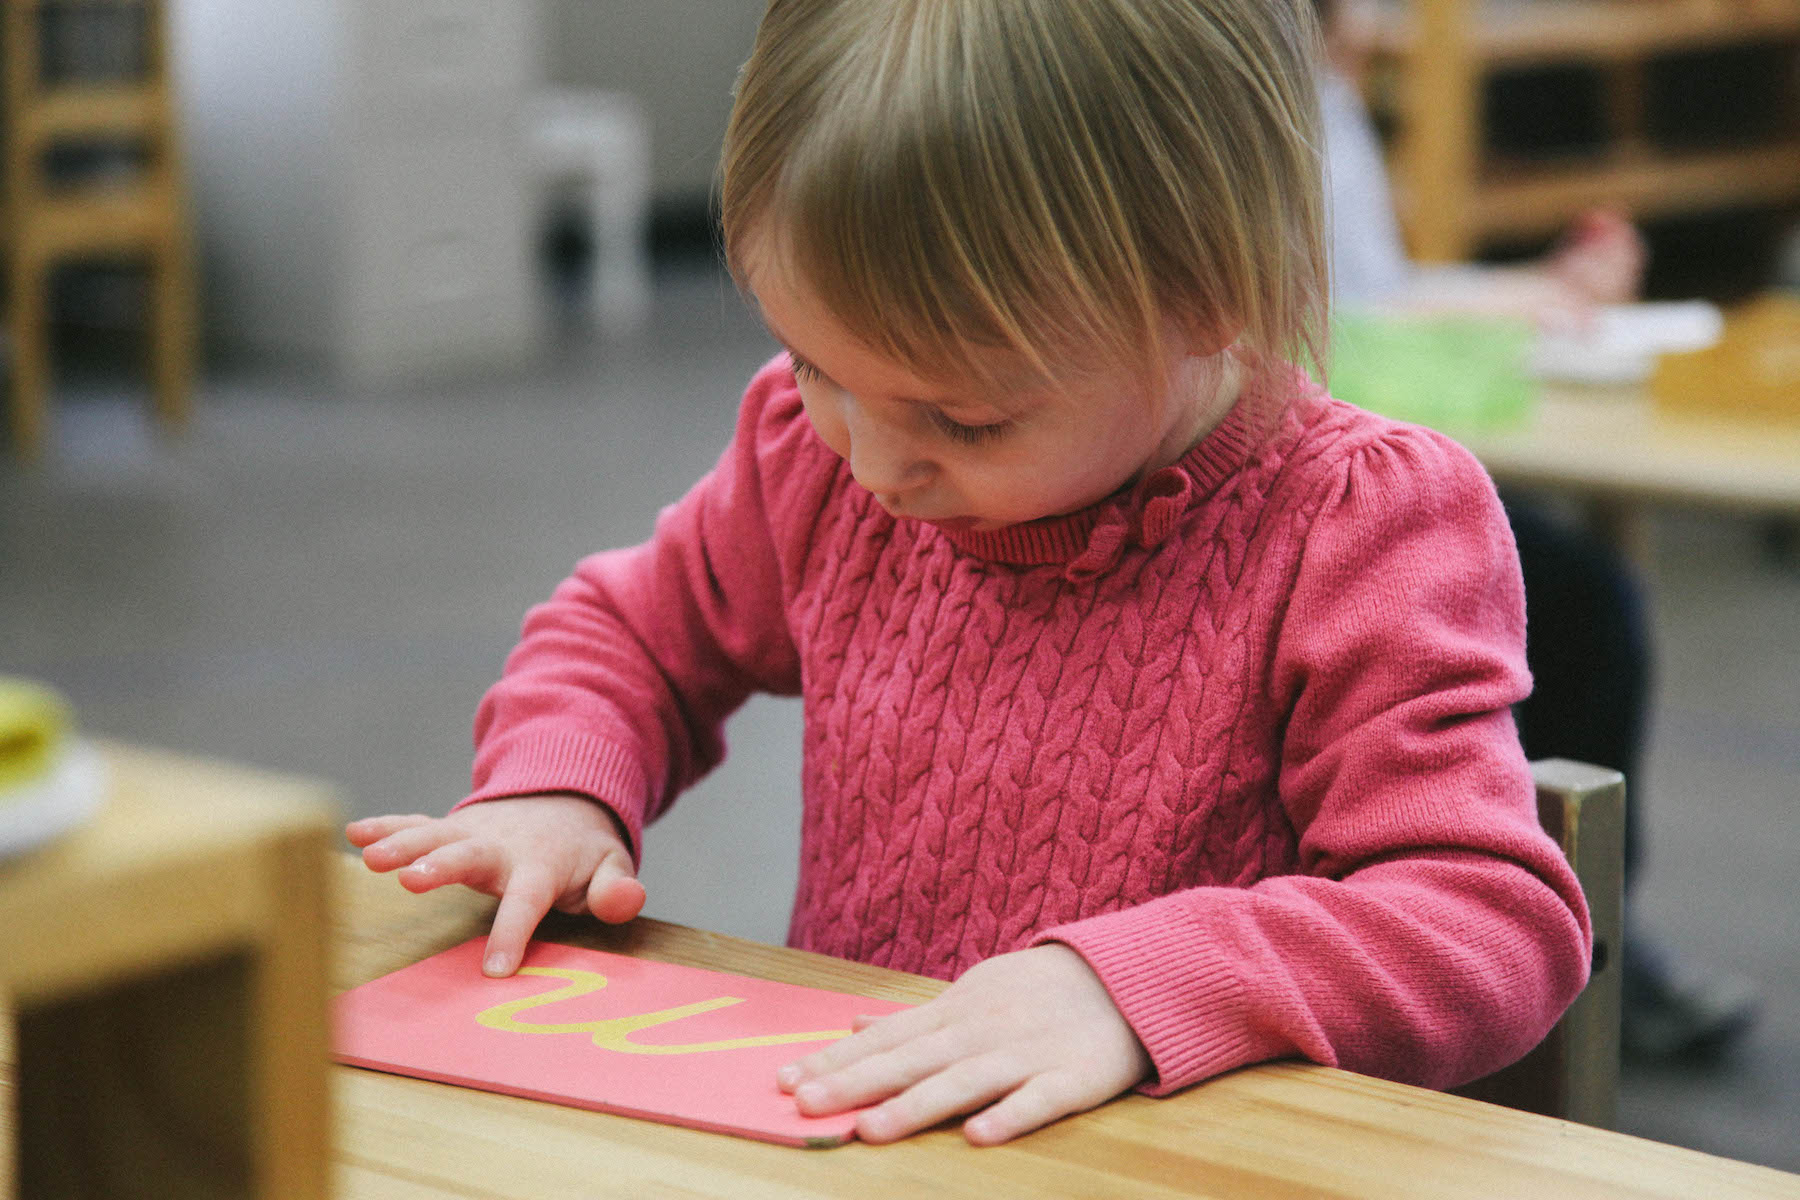
Most commercial materials and much public school instruction starts with capital print letters. This is contrary to what a child actually needs: 93% of what we read and write is written in lowercase letters, as is most of the writing they’ll do. That’s why in Montessori classrooms, we introduce lower-case letters first, and introduce capitals only later. Children in Montessori learn to associate letter sounds with letter shapes using a material called the Montessori Sandpaper Letters.


Children begin learning the letter sounds using sandpaper letters, which incorporate the sense of touch to further reinforce learning. They trace the letter with their fingers on a textured sandpaper inscription of the letter, learning the strokes used eventually to write that letter on paper.
Why do you present the letters out of (alphabetical) order?
When giving these lessons, Montessori guides present no more than three letter sounds at a time. There is no specified order of introduction, other than making sure that the letters don’t look and/or sound alike. One example of a presentation order is:
First set: c m a t
Second set: s r i p
Third set: b f o g
Fourth set: h j u l
Fifth set: d w e n
Sixth set: k q v x y z
Some Montessorians first introduce the first letter of the child’s name as a point of interest.
Why does writing precede reading?
The process and connection to writing will always precede that of reading. Cognitively, writing is just an analytical process that involves breaking down a word into its sounds. Reading is a more advanced mental process, requiring both analysis AND synthesis (putting the parts together).
Usually, children begins reading about six months after they start writing (composing words). Why? When you are writing, you are expressing your own thoughts. You are coupling sounds together to express your own intended meaning. Reading, on the other hand, involves putting sounds together and analyzing their meaning and order to comprehend an unknown meaning.
Why do you use hands-on materials to teach writing and reading?
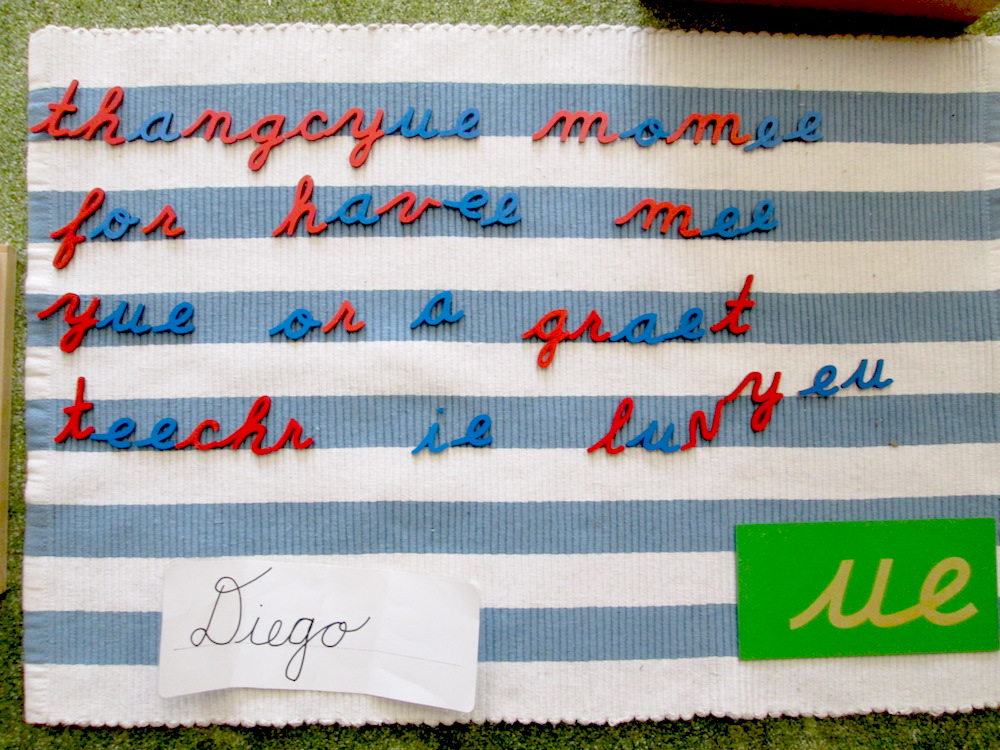
Separate handwriting from word-building. For a child to write a word, he needs to combine two separate skills: he needs to segment the word into sounds, represented by letters—and he needs to have the motor skills to write these letters on a piece of paper. Often, children can associate sounds with letters long before they can easily form the letters: their conceptual understanding of language is more advanced than their motor skills. That’s why in the Montessori program, children first “write” by building words with the Montessori Moveable Alphabet, a set of wooden letters that a child can arrange in different orders. They make words by placing the letters on a rug. This enables them to practice putting sounds together to make words—separated from the more challenging task of forming the letters with a pencil.


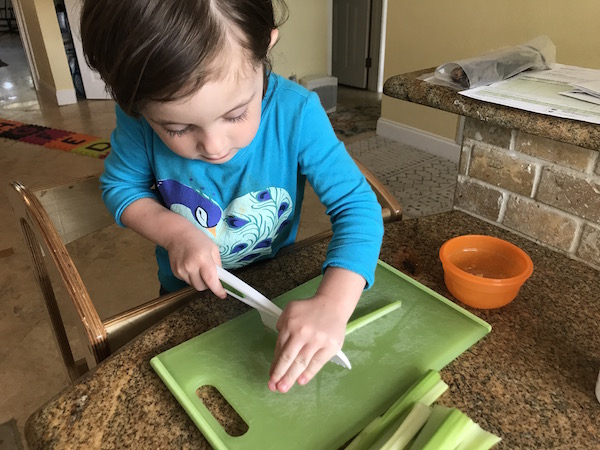
Children in Montessori classrooms also prepare the hand for writing with physical exercises, such as those found in our Practical Life and Sensorial areas. Children need to cut with scissors; they need to paint, to sew, to peel eggs, to wash tables; they need to build towers, hold puzzles by little knobs and carry big materials. These indirect preparatory materials strengthen shoulder, arm, wrist and finger muscles! The Montessori Metal Insets then help children joyfully master full pencil control: as they trace the inside and outside of the shapes, and color them in with careful, parallel lines, they have fun creating art and are imperceptibly and steadily improving their pencil control.
Why do you teach cursive first?
While cursive letters seem intimidating to most adults, they actually prove to be easier to learn than print letters: while writing in cursive, you don’t have to continuously lift the pencil off the page. This makes the act of writing fluid and continuous, without the extra stops and starts associated with print letters. In addition, letters that are easy to confuse in print are distinct in cursive, so children are less likely to reverse these letters.


Fascinating new research points out the benefits of cursive writing for cognitive development. A recent article in Psychology Today cited research which shows that:
- Students “wrote more words, faster, and expressed more ideas when writing essays by hand versus with a keyboard.” This study included second, fourth, and sixth graders.
- “Cursive writing helps train the brain to integrate visual (and) tactile information, and fine motor dexterity.”
- The regions of the brain that are activated during reading were “activated during handwriting, but not during typing.”
How can parents help at home?
You can help by:
- Articulating slowly and carefully
- Encouraging the children to speak and pronounce words
- Repeating new words
- Singing songs
- Reading books
- Reciting poetry
- Playing sound games like “I Spy” (see below)
- Please do not teach your child to memorize the names of the letters! Instead, emphasize the sound that each letter makes.
- Write in cursive when writing with your child
- Use lowercase letters when writing with your child
- Enjoy activities that build the muscles needed for writing (cutting, painting, etc.)
The “I Spy” Game
Here’s a great way to start on letter sounds, suitable for children of about 2 ½ years or older: Play a sound “I spy” game. Collect a few items with different beginning sounds (a fork, a cup, a napkin, for example). Place each item in your hand, and focus your child’s interest on the sound at the beginning of the word: “I spy something in my hand that starts with fffff: a f f f fork.” Once your child has mastered the sounds, you can advance to playing real “I spy”, asking them to look around and find items in their environment that start with the letter sound you mention. You can play this game at home, while on a walk, or in the car!

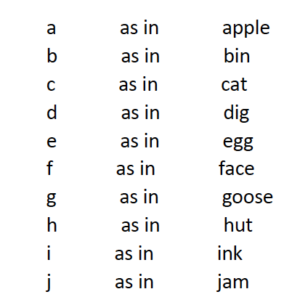
An important note: When making letter sounds with your child, be careful not to add the sound “uh” to the end. Letter sounds should be clipped to include only the consonant itself, such as “c” as in “cat” – and not “cuh.” You can download a list of Phonetic Letter Sounds here.

Greetings from Florida! For those of you who don’t know me, I was a Lower Elementary guide and then the Director of Admissions at Greenspring before moving to Florida. I began this series on Montessori in the Home to help parents find creative ways to implement Montessori practices at home. My daughter, Lila, just turned four. Her play space has evolved since she was an infant, but the guiding principles remain the same.
Setting up a Montessori-inspired play space at home does not require a great deal of time or expense. The goal is simply to create a space that encourages independence and concentration. Here are some key components to keep in mind:
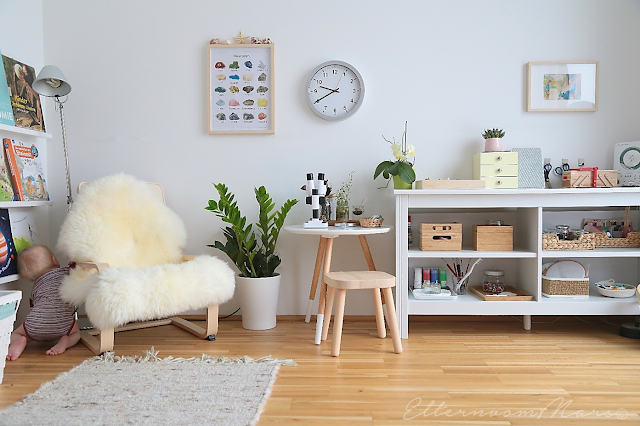
Simplify: Montessori spaces use more neutral colors and have very little (or nothing) hanging on the walls. What is displayed on the walls is carefully chosen and hanging at the child’s eye level. The goal is to reduce the visual stimulation of the environment, so that the child will be attracted to the materials (toys) and be able to concentrate on her work (play).


A sample play space for a young toddler A sample play space for a six year old
Reduce: Consider reducing the number of toys available. You may use a small shelving unit with two or three shelves and just a few items on each shelf. Putting out just a few toys at once, and rotating them regularly, allows your child to focus on what’s available. Also, rotating toys will rekindle your child’s interest in older toys that they haven’t seen for a while. When a toy has remained on the shelf for a whole week untouched, you know it’s time to put it away and put out something different.
Organize: Children have a sensitive period for order from birth through age five, peaking in early toddlerhood. You can see this through young children’s love for routine and repetition. Young children are most comfortable when their physical environments are orderly. Montessori environments support this desire for order by designating a specific spot for each material. In a play area, instead of a big toy bins full of many unrelated things, each toy has a space where it belongs on a shelf. Toys with multiple pieces, like blocks or play animals, can be organized in small baskets or trays on the shelf. You can even attach photos to each bin or shelf so that the child knows exactly where each toy belongs.
Provide varied work spaces: The furniture in Montessori classrooms is child-sized and the materials are kept on low shelves so that the child can access them independently. If you have the space at home, it’s ideal to include a child-size table and chair(s), an open space allowing for movement and large floor work, and a cozy spot for resting or recovering from an upsetting moment.
Include nature: If possible, choose a room with natural light. House plants offer children a chance to take care of something, as well as adding natural beauty to the room. Young children also love watching fish or other pets and older children can help feed and care for them as well. You might also consider setting up an outdoor play area where your child can dig in the dirt, water plants, enjoy sand and water play, and do messy art projects.
Choose toys carefully: While there is no need to fill your home with “academic” work, you can select toys that help your child develop in different ways. You might think about including toys that develop fine motor (small muscles), gross motor (big muscles), art and music, books, and open-ended items (like blocks) for creative play. It’s also important to include toys that offer a varying degree of difficulty. You want a mix of challenging toys and things that are easy and familiar for her to play with when she needs a mental break. Open-ended toys that engage rather than entertain (such as those that light up or make noises) will encourage creativity and concentration.
Give it a try! This might seem like a lot to think about, but you can pick and choose what works for your child and your home. I feel free to “break the rules.” I still keep all of Lila’s stuffed animals in one large bin. And though most gifts made of plastic or requiring batteries “disappear” after a few days, a few favorites have been allowed to stay. And despite my best intentions, getting Lila interested in “clean up time” is still a constant struggle. So don’t be too hard on yourself. Just have fun with it!
*By the way, you don’t need to spend a lot of money on toys, especially for young children. These have been some of Lila’s favorites over the years:


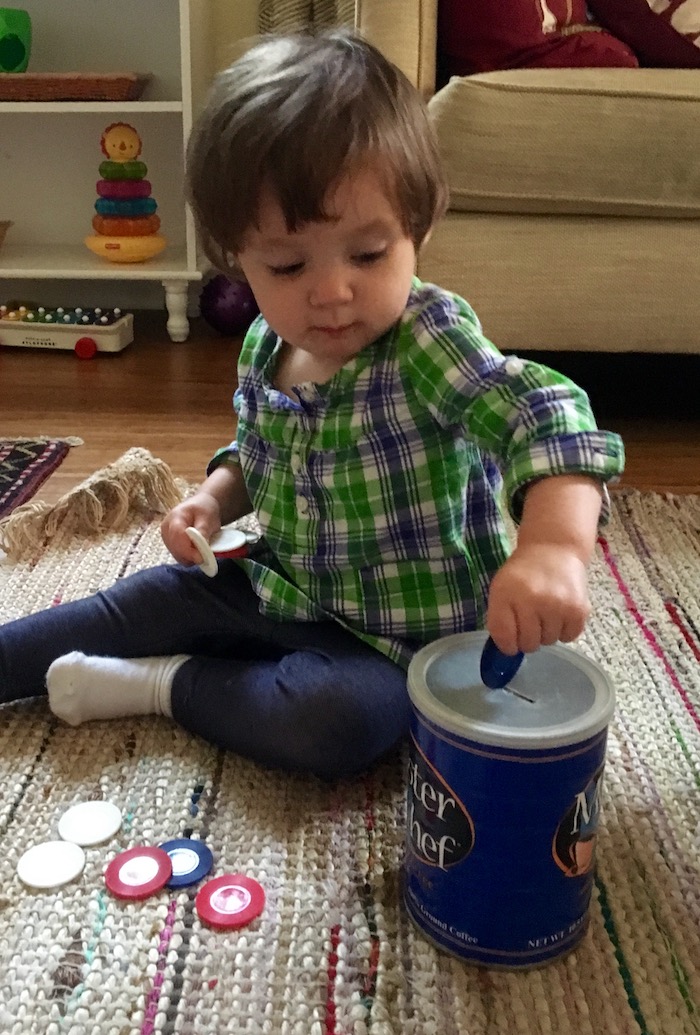
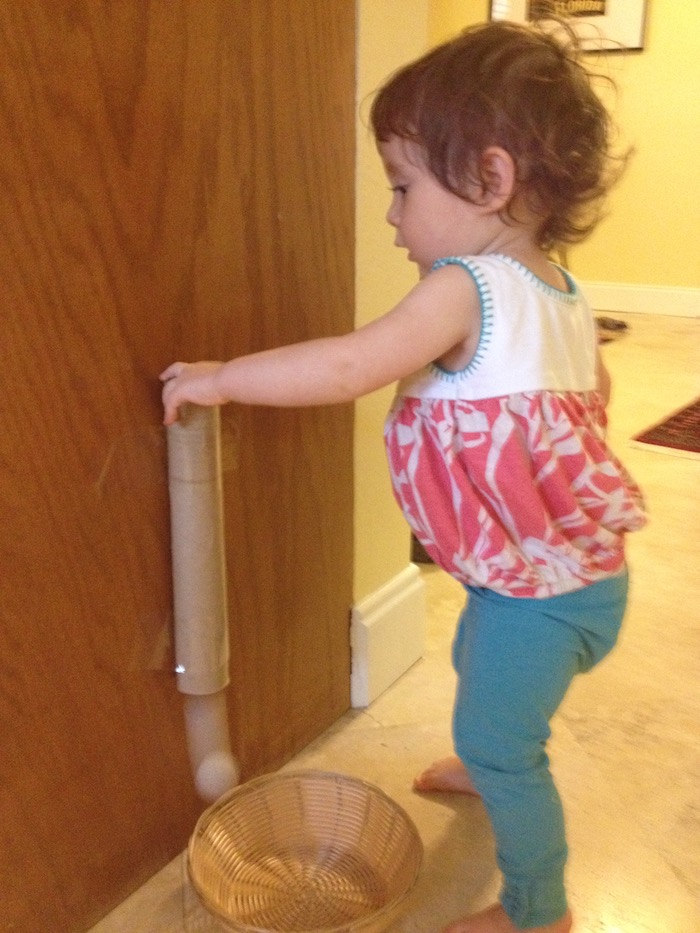
Scooping jingle bells into a metal muffin tin, posting poker chips into a coffee can, and posting ping pong balls through a paper towel tube.


As a toddler, Lila enjoyed the sound that polished stones made when dropped into a glass bowl; later she enjoyed sorting them by size and color; now she is interested in rocks and minerals.


Lila keeps a collection of natural treasures; recyclable materials make wonderful art supplies. Now Lila stops me on the way to the recycling bin and says, “Wait, we can make art with that!”
I have also written about setting up a Montessori kitchen, Montessori bedroom and a Montessori bathroom. Questions, comments, suggestions? Email me at mjarrell@greenspringmontessori.org.
Greetings from Florida! For those of you who don’t know me, I was a Lower Elementary guide and then the Director of Admissions at Greenspring before moving to Florida. I have begun this series on Montessori in the Home to help parents find creative ways to implement Montessori practices into day-to-day activities at home. My daughter, Lila, is now three and a half and loves to work in the kitchen!
Getting Involved
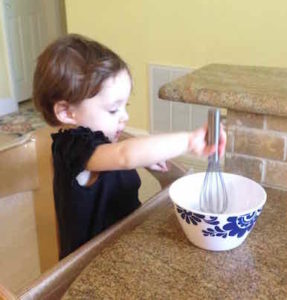
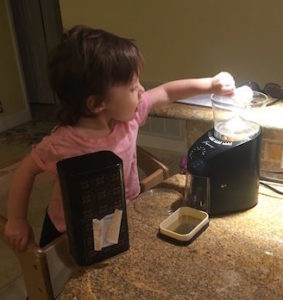
Lila has been an active participant in the kitchen since she was very small. Early activities included stirring batter, washing and scrubbing fruits and vegetables, peeling clementines and bananas, pouring coffee beans into the grinder, and dipping bread into eggs for french toast.

These activities help build the essential skills of coordination, concentration, order, and independence. The work also exposes the child to tasting new foods. Lila was always more interested in eating something that she helped to prepare.


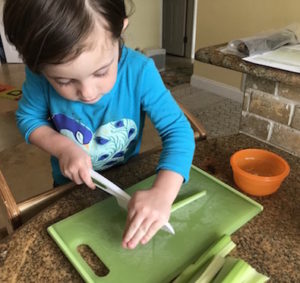
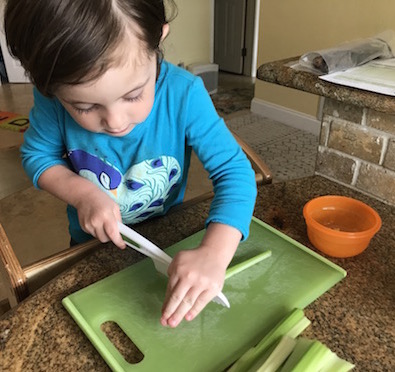
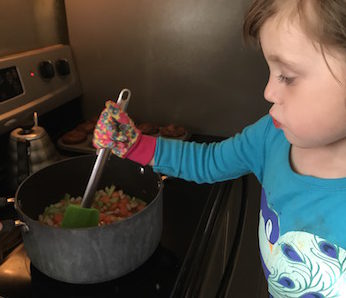
As her fine motor coordination increased, Lila started shucking corn, rolling dough, peeling and slicing eggs and bananas with special tools, and peeling carrots and cucumbers with a peeler and wavy chopper. Now Lila is also slicing vegetables with an acrylic knife, grating cheese, and juicing oranges. Child-size gardening gloves allow Lila to stir soup and flip pancakes without fear of touching the hot pan.


Involving a toddler at dinner time when everyone is tired can be challenging. If I have a few extra minutes earlier in the day, I will prepare part of the meal while Lila is still at school. This will allow me to focus more energy on her participation during the meal preparation. Sometimes I plan our joint projects for the weekends when I have more energy.
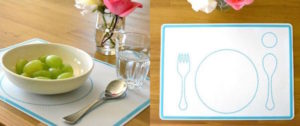

There are other ways besides cooking that children can help. Setting the table, sweeping up crumbs, and placing dirty dishes in the dishwasher are other ways that little ones can contribute. Montessorians know that children’s self-esteem comes from making meaningful contributions, rather than receiving compliments. So allowing children to be active participants in the family is a tremendous gift!
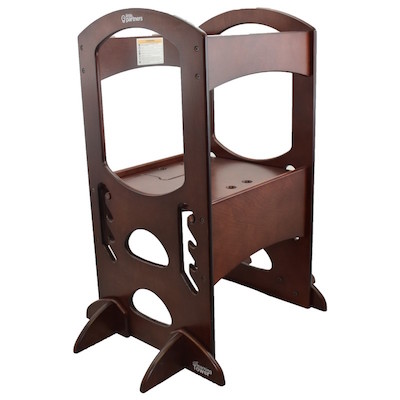
Learning Tower
The single most important tool you will need to allow your child to participate in the kitchen is a safe stool. We put the “Learning Tower” on our baby gift registry before Lila was born. Three and a half years later, we are still using it every day. When Lila was very small, we wrapped the sides with saran wrap so she couldn’t fall out. Soon she was able to climb in and out independently. The adjustable height allows the stool to grow with her. And you don’t need to worry about her falling off a regular stool.


I have seen some great “hacks” on the internet for converting an Ikea stool into a learning tower, for a much lower cost. If you’re handy, this is definitely worth a try!
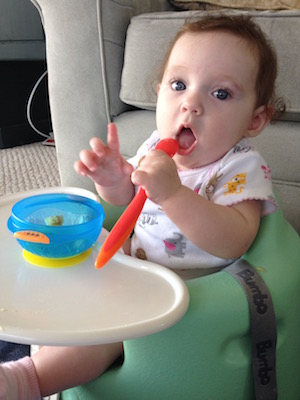
Eating Independently
As much as your child will enjoy helping prepare food, she will also be highly motivated to eat independently. When Lila was very small, she sat in a Bumbo or high chair. As soon as she was able to sit in a chair without falling off, we moved her to a toddler-size table and chair. (The table was bought from Ikea with the legs chopped to make it shorter.)


While she still sat in a high chair for family dinner at the dining table, all other meals and snacks were eaten at her special table. Soon, Lila began rejecting the high chair. That’s when we switched to a booster seat in a regular dining chair.
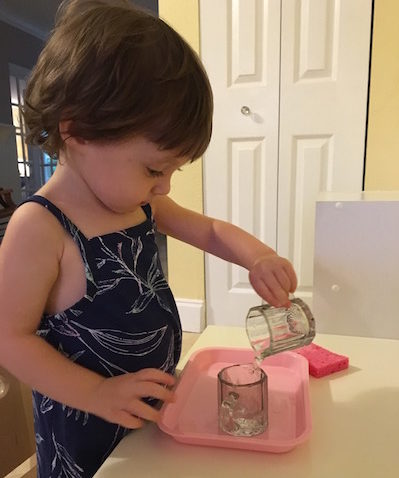
Montessori Services makes child-size glass dishes that are very sturdy. While I don’t like to replicate too many Montessori lessons in the home (as I like them to remain special at school and be presented by the experts!), I did invest in two small glass pitchers so that Lila could practice pouring. I have a full list of recommended supplies below.


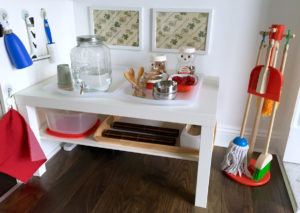
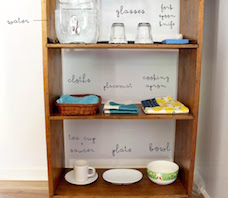
In order to further increase independence, you can make child-size dishes, utensils, kitchen tools, and cleaning supplies available at the child’s level. This can be a special shelf or just a lower kitchen cabinet that you dedicate for your child’s kitchen items.

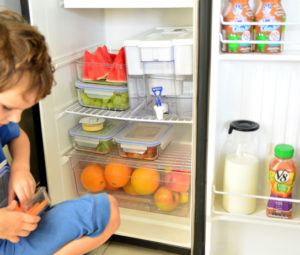

You might consider creating a water and snack station on a low shelf or table. By having water and healthy snacks available at all times, your child can help herself to food when she is hungry. You can also dedicate a low shelf of the refrigerator for your child’s use and keep liquids in smaller containers that are easy to pour.
Don’t feel like you need to tackle all of this at once. Try picking just one new system to implement in your home and see how it works!
I have also written about setting up a Montessori bedroom and a Montessori bathroom. Next I will tackle the play area! Questions, comments, suggestions? Email me at mjarrell@greenspringmontessori.org.
Resources:
There are many wonderful tools to help young children work safely in the kitchen.

Some of my favorite resources include:
Montessori Services (child-size tools)
How We Montessori (blog)
Some of my favorite products include:
- Learning tower or sturdy stool
- Child-size apron
- Wavy chopper
- Banana slicer
- Apple slicer
- Egg and mushroom slicer
- Citrus juicer/grater
- Nylon knife
- Peeler
- Non-skid cutting board
- Non-skid mixing bowl
- Spatula, mixing spoon, scrapers, whisk
- Child-size rolling pin
- Child-size oven mitts
- Child-size pitcher, glasses, plates, and utensils
- Spreaders
- Dishwashing station
- Non-toxic cleaning supplies


We all know that young children thrive on consistency and routine. Dr. Montessori discovered that children from ages one to four are actually in a “sensitive period” for order. This means that not only do they crave consistency from their environment and schedule, but that toddlers are particularly attuned to developing an internal sense of order at this age, if given opportunities to develop this skill.
For this reason, Montessori environments – both at school and in the home – are carefully prepared so that every item has a place. (I have previously posted about setting up Montessori spaces in the home – the bedroom and the bathroom – and am currently working on a piece about the kitchen.) But while it’s fairly easy to create physical places for things, creating a sense of order throughout the day is far more difficult. Young children have a strong need to feel in control and yet so much of what happens during the day is determined by others. Plus, toddlers can’t yet grasp the concept of time – today, tomorrow and yesterday – because the part of the brain that is able to plan ahead and make predictions about the future is still developing.
Creating a few simple routines at home can help your toddler practice making simple predictions, as well as understand concepts such as “before and after.” A consistent routine can (sometimes) eliminate power struggles because your child feels more control over what is happening. A routine is especially helpful during difficult times of day, such as at bedtime or when getting ready for school in the morning.
I’ve collected a few tips good from the experts:
Include preparation for transitions in the routine. For example, say, “We have 10 minutes left before we start getting ready for bed. Since toddlers can’t read a clock, try setting a timer. When the timer goes off, it’s time to start the bedtime routine.
Include opportunities for (limited) choice. Toddlers like to feel in control. You can create the illusion of choice, such as “Are you going to wear the blue shirt or the red shirt?” By putting clothes where your child can access them, this also allows for greater control (aka, independence!) over the process.

Get silly! Even with consistent routines, toddlers will still test the limits. Recently, my daughter, Lila, started to resist getting dressed in the morning. Now my husband helps her “hop” into her clothes and then challenges her to see how high she can jump on the trampoline in her “jumping pants.” Hey, whatever works! And when this stops working, we’ll have to change it up again.
Try creating a picture schedule for your child. During her transition to a Montessori toddler program, Lila began to ask every morning, “Is there school today?” So we created a photo schedule that would show what was going to happen each day of the week. It allows us to discuss the next day’s schedule and Lila can refer to the schedule when she wants to know what is going to happen next. I have found several websites that offer free printables for daily routines, such as these on pricelessparenting.com. Older children may enjoy drawing pictures for their charts.
 Practice routines with activities that are fun, as well as chores. Routines aren’t only for things kids have to do. Lila enjoys making coffee with her daddy on Saturday mornings. She loves being the taskmaster: “Step 1: Grind the beans!”
Keep your daily schedule as predictable as possible. Your child will take comfort in knowing that she goes to school in the morning, comes home for lunch and a nap, and then has playtime in the afternoon. For this reason, we chose to enroll Lila in a Montessori toddler program five mornings a week. Her adjustment to school still included separation anxiety, but thanks to the consistent schedule, Lila quickly began to learn what to expect each day, and this knowledge provided some comfort. In a matter of a few weeks, Lila began to see school as a joyful place where she belonged; now she walks through that classroom door without looking back!
Stay flexible. Of course, children do need to learn how be flexible and deal with minor changes. But that’s why we offer children a predictable routine as a foundation–so they can rise to the occasion to handle big changes when they need to. If there is an interruption to the routine, you can tell your child, “I know we usually do ___, but today we are going to do ___ because (reason). Tomorrow we will go back to our usual schedule.”
It is never too late to start a routine. You can introduce a new routine by saying, “The way that we have been doing things has not been working. We are going to try something new. Here is our new schedule.” Give the new routine some time before making adjustments. Your toddler will resist at first; consistency is key!
To read more about the benefits of setting up routines for your toddler, check out this article by Aha! Parenting.
If you would like to learn more about our Toddler program, please click here.

Does this sound familiar?
“How was your day?” … “Fine.”
“What did you do at school?” … “Nothing.”
It can be hard to get children to open up about what’s going on in their world, especially after a long day at school. Here are a few different communication strategies you can try. Find ones that work best for your family and then practice until they become part of your daily routine. This process takes time but can lead to more satisfying conversations in the long run.
Strategies to Try:
Wait at least a half an hour
After a long day at school wait at least 30 minutes to trying to engage in a conversation. Give your child a chance to take off the backpack, relax, and have a snack.
Ask open-ended questions
“Do you have homework?” or “Did you give your speech?” are questions that only invite a yes or no response. So try to pose open ended questions. Get creative! (There is a list of examples below.)
Be present
The moment your child starts to engage in conversation, stop what you are doing, and give your full attention. It can be hard to tear yourself away from what you’re doing to focus on a child’s question or comment, but your response can either encourage or shut down the conversation. Don’t forget to look interested!
Listen! And stretch the conversation…
Don’t talk, listen! Try comments like “Really?” “Uh-huh?” “I don’t believe it!” “Wow!” to stretch the conversation. They are non-threatening and invite the child to open up. You can also reflect back what the child is saying so they know you understand, and then be quiet so they can talk more. Child: “I played on the swing.” You: “You played on the swing.” The trick is to repeat the tidbit in a matter-of-fact but interested way to get your child to open up and add more.
Try to listen without judgement
Pushing, prodding, demanding, coaxing, lecturing, and threatening are sure ways to end conversations. Questions that begin with “Why” often make kids defensive. “Why did you wear that?” won’t work nearly as well as, “What do you think most of the kids will be wearing to the theater?”
Resist the urge to jump in with solutions and advice
Your child needs a chance to vent and can’t hear advice until she does. Then she needs a chance to figure out her own solutions, which is how she develops confidence and competence. When we can reflect feelings and then help children brainstorm solutions, kids find us more useful to talk to — and they’re more likely to seek us out when they have problems.
Take advantage of indirect communication
Kids often open more in the car, on a walk, or in the dark — all times when eye contact is limited. Remember that these are great times to get kids talking. Another opportunity for indirect communication is when their friends are over or in your car. Just keep quiet and listen. Your child knows you’re there, of course, but often is more willing to talk than if you were speaking directly.

Questions a child might answer at the end of a long school day:
What made you laugh today?
Did anything silly happen?
Did anyone do anything super nice for you?
What is the nicest thing you did for someone else?
Was there an example of unkindness? How did you respond?
What games did you play at recess?
Does everyone have a friend at recess?
Who did you sit with at lunch?
Who do you want to make friends with but haven’t yet? Why not?
Did you help anyone today?
Did you tell anyone “thank you?”
Who inspired you today?
What is something that surprised you?
What is something that challenged you?
What made you feel proud?
How were you brave today?
Will you teach me a song you learned at school?
What was your least favorite part of the day?
Tell me something good (or three!) that happened today.
What are you looking forward to tomorrow?
Do you have a teenager? Huffington Post has some great ideas about starting the conversation with your teenage children. Take a look here – https://www.huffingtonpost.com/liz-evans/28-ways-to-ask-your-teens-how-was-school-today-without-asking-them-how-was-school-today_b_5751546.html
If you are interested in learning more about Greenspring Montessori School, please click here to request more information.


